I'm too slow:
Nayru's Love (1) | Din's Flare (2) | Farore's Wind (1) | Phantom Strike (3)
Format: Singles
This set focuses on dealing with Zelda's weakness to quick characters by giving her a faster projectile and a phantom suited for close combat. Phantom Strike covers a large area directly in front of Zelda that can easily punish approaches. This option also removes the blind spot that fast characters can easily get by on the default. Din's Flare is faster and covers a very long range. This allows you to space out the opponent and rack up safe damage.
|
Pros:
+ Faster projectile to space and pressure with.+ Increased kill range with Din's Flare. + Phantom Strike removes the blind spot that the other phantoms have and gives you a better anti-approach tool.+ Phantom Strike fully charges in half the time. |
Cons:
- You lose a lot of offstage pressure since you can no longer aim Din's Flare vertically. - Phantom Strike loses the ability to kill.- You lose your long range Phantom Attacks.- Landing traps with Din's Flare are much harder to pull off. |
Din's Flare:
A smaller and faster version of the default with extended range. The explosion is instant and the damage is no longer dependent on distance, but it can't be aimed vertically (It can, just an extremely small amount). Deals 14% damage on sweet spots and 7% on sour spots. Din's Flare is great against fast characters since it allows you to cover a larger range at a faster rate. This is also a safer option to use since there is less time to be punished for use it. The only bad part about this custom is you lose the vertical movement that is useful for creating landing traps and offstage pressure.
Tradeoffs:
Din's Flare is the fastest and easiest version of Din's Fire to use. It has the longest reach and the explosion happens instantly. It can reach all the way across FD/Omega stages in 2 seconds. Unlike the default, Din's Flare does consistent damage no matter how far it travels. The trade off for this move is it's a lot faster and has an extended distance, but it loses the ability to travel vertical. This makes Din's Flare a very simple, but effective attack to use. One thing you will notice immediately when using Din's Flare is that it's very hard to punish players offstage with it.
|
Spacing:
Din's Flare is a great attack at any range since it's quick and has consistent damage. This custom is your main answer to Zelda's issue with fast characters since you can wall them out with a faster and more threatening projectile. They also have a harder time punishing you for using it thanks to the increased speed! Sadly, this custom will remove a lot of your offstage pressure since the vertical movement is basically non-existant. Landing traps also become more difficult for this same reason. |
|
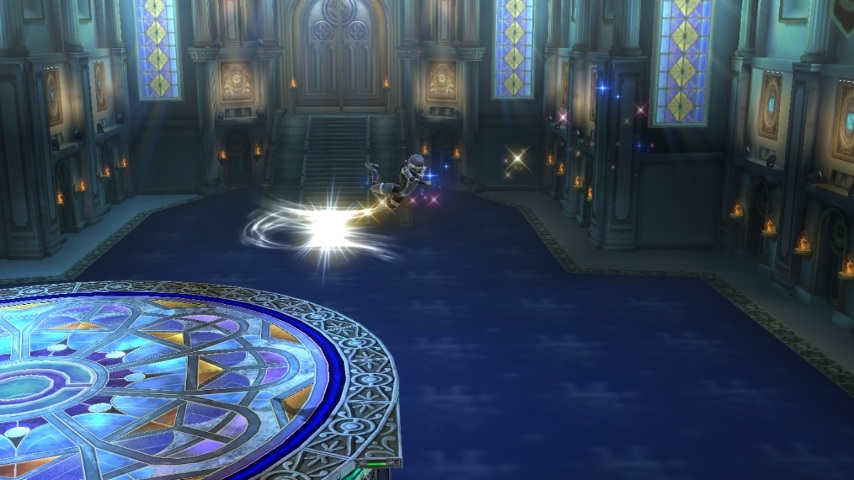
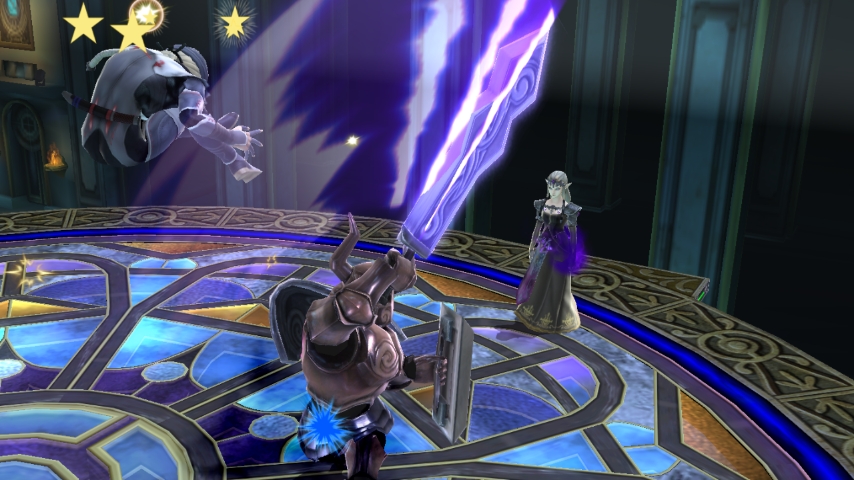
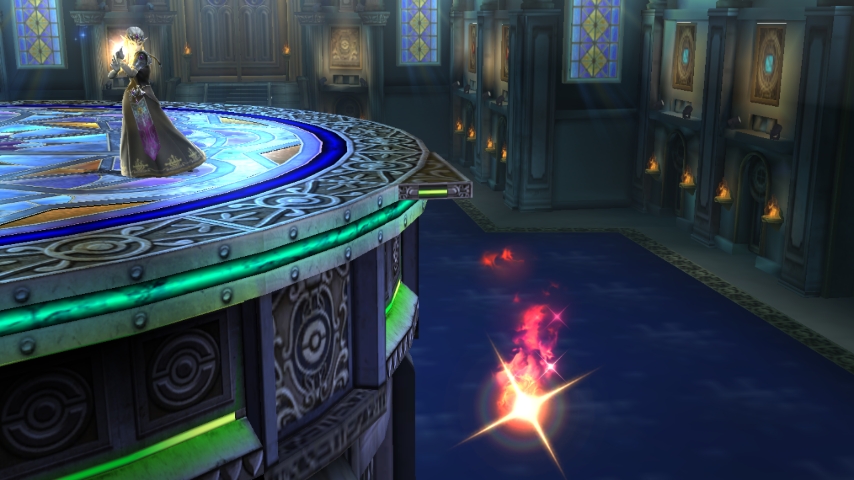
Phantom Strike:
Charges faster than the default and inflicts a lot of damage, but the phantom remains next to Zelda regardless of charge level. This custom is a great option to punish approaches since it charges very fast and covers the floor and air with the phantom's attack. Phantom Strike also removes the blind spot in front of Zelda that the default has. This move loses the ability to kill but it deals 28% on full charge if both hits connect. (Phantom Strike only kills at 900%+)
Tradeoffs:
Phantom Strike remains in front of Zelda regardless of charge level. You lose your long ranged phantom attacks in exchange for powerful close ranged attacks. Phantom Strike fully charges in 1 second and offers a great anti-approach option. This custom also sacrifices the kill potential from Phantom Slash in exchange for an increase of damage.
|
Spacing:
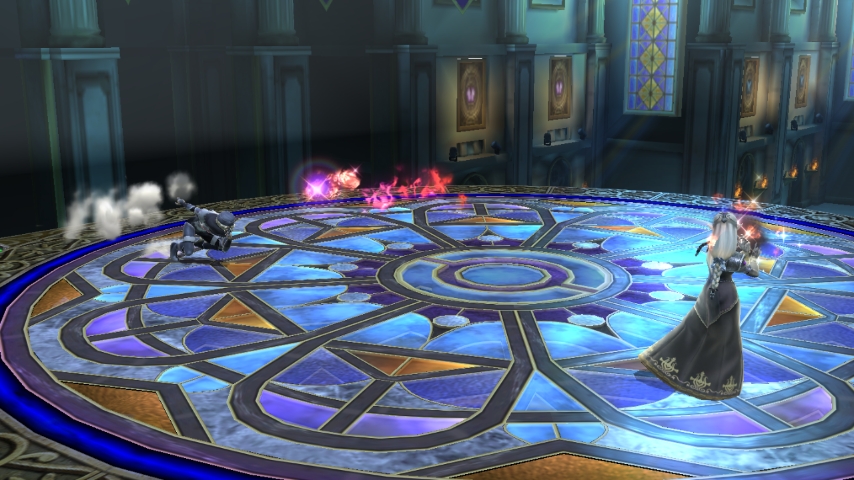
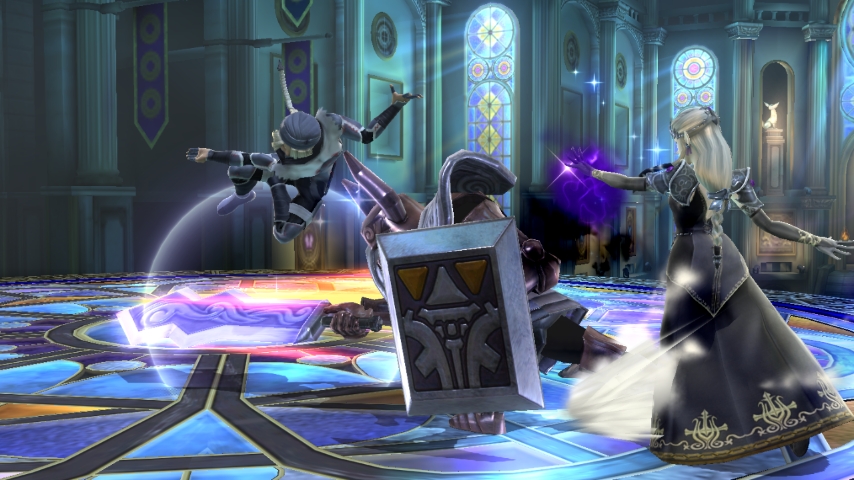
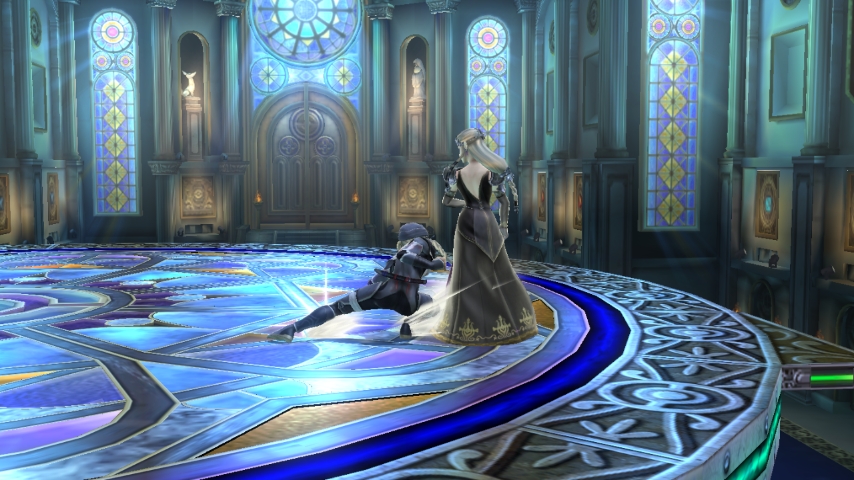
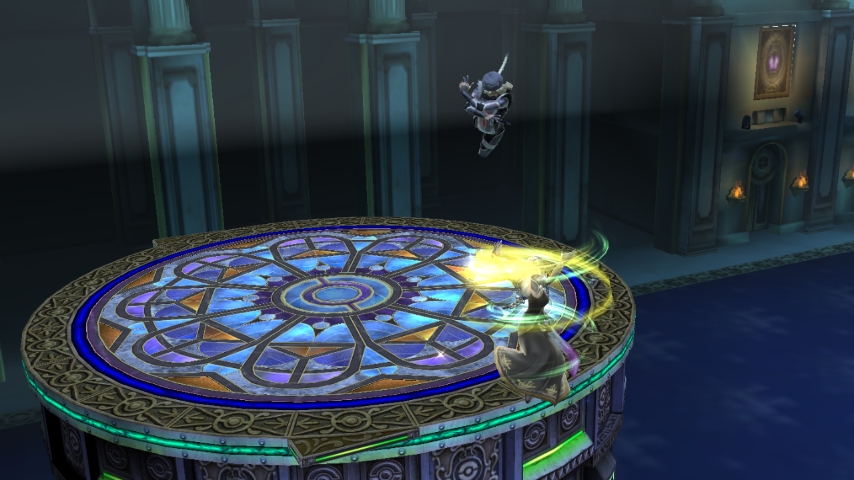
Phantom Strike removes a lot of distance from the default in exchange for a more defensive based attack. This custom makes it very difficult to approach Zelda safely since you can catch aerial or ground based attacks fairly quickly thanks to the decreased charge time. Since the Phantom remains in front of you no matter what you can freely throw out this attack to block approaches and cover your weakness in close combat. If the opponent rushes at you in attempt to punish Phantom Strike you can release it as you are being hit to trade blows and inflict a huge chunk of damage, this will also prevent any kind of follow up from them. I doubt your opponents will try to trade with a 28% damaging attack very often. Image 1 is an example of a successful blocked approach. Image 2 is an example of a trade scenario where Sheik lands a dash attack but receives a two fold attack from the Phantom in exchange. |
I'm falling but I can't.. Oh nvm:
Nayru's Love (1) | Din's Fire (1) | Farore's Squall (2) | Phantom Breaker (2)
Format: Singles
A support set for doubles when your partner has a lacking recovery or moves that can abuse the push affect of Farore's Squall. Farore's Squall allows you to carry people back on stage without damaging them. You can also use it to push people away offstage for gimps. Phantom Breaker can be a little difficult to use when there are 4 players on the stage but it supplies a large amount of shield pressure. Phantom Strike also works if you need a move to halt approaches without worrying about hitting your partner. Din's custom is a matter of personal preference. Din's Blaze allows you to set up traps for your partner to follow up with while Din's Fire allows you to follow up your partner to land kills.
|
Pros:
+ You gain a lot of support potential with Farore's Squall. + Farore's Squall can negate attacks by pushing them away before it connects. This unique property can also gimp some recoveries. + Phantom Breaker gives you a strong spacing option. |
Cons:
- You lose a lot of kill potential by using Farore's Squall. - Farore's Squall has a slower start up. - Phantom Breaker can be hard to use with 4 players on the stage. - You lose your close range Phantom Attacks. |
Farore's Squall:
A non-damaging version of the default that pushes/pulls opponents with a wind box and throws them into the air on the second hit. During the teleport Zelda becomes a golden ball of light cloaked in wind that pulls anything she passes through with her. This may seem like a useless custom compared to the default but it can have some interesting results when used in teams. Farore's Squall can be used right behind your partner while they are charging an attack to push them towards the opponents team. Farore's Squall can also be used to aid your partner's recovery offstage. For example: Little Mac is very gimpable offstage but Zelda can easily carry him back on stage with Farore's Squall.
Tradeoffs:
Farore's Squall sacrifices the destructive power of Farore's Wind. In exchange, this custom grants a large amount of supportive properties in team battles. Farore's Squall is a non-damaging attack that pushes or pulls players with a wind box. This allows you to push or pull your teammates to extend their attacking range or save them offstage. It also allows you to do the opposite to your opponents by pushing them away from the stage when they are trying to recover. The start up of Farore's Squall is a little slower than Farore's Wind but it travels slightly farther.
|
Squall Boosting:
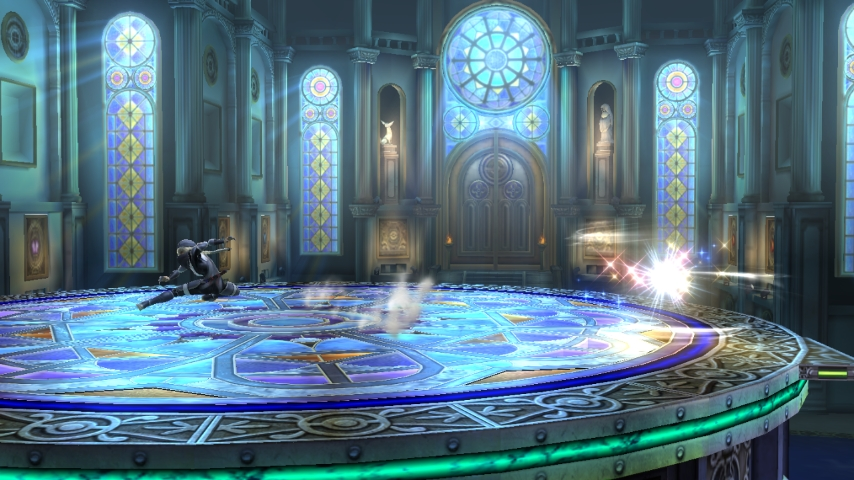
Farore's Squall can be an extremely effective custom in teams by using the push effect to extend your partners range and catch opponents by surprise. You can freely use it on your partner since this is a non damaging attack. You can basically mimic DACUS for every single one of your partner's moves. Look at that distance! |
Squall Shifting:
Farore's Squall can be used to save your partner launched offstage using the pull effect. This can be extremely handy when you are paired with a character that has a poor recovery. You can also carry or reflect item based projectiles with Farore's Squall. |
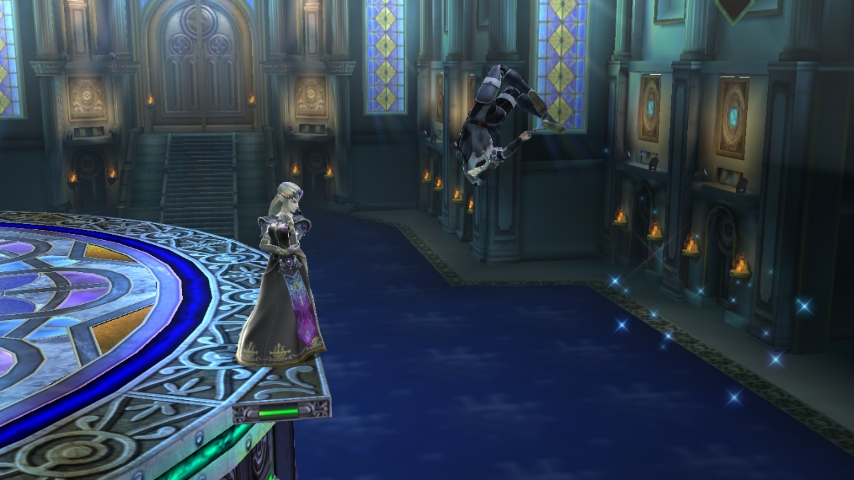
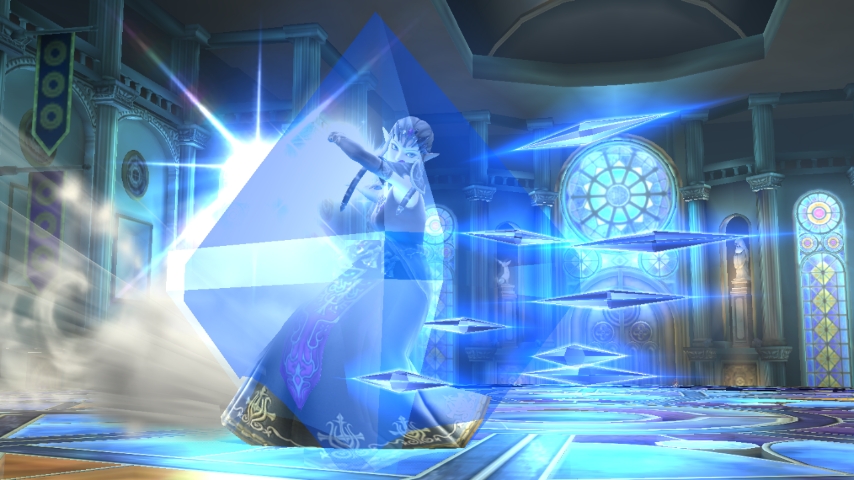
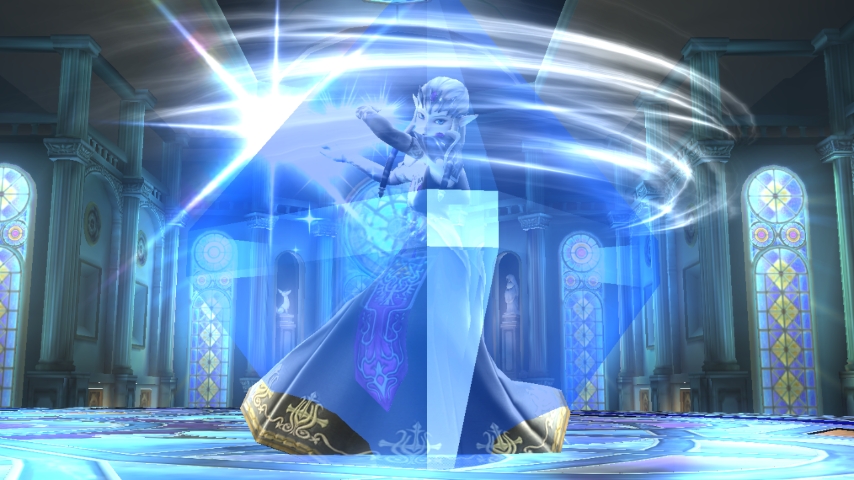
Squall Walling:
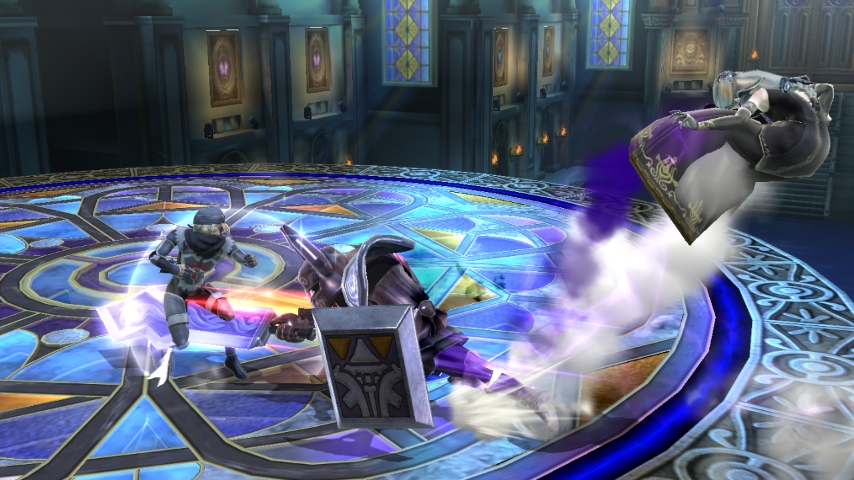
Farore's Squall can block attacks while pushing the opponent away. For example, Sheik's Bouncing Fish was completely negated and she was pushed away in the images above. You can also gimp opponents offstage by using the push effect to blow them away from the stage. |
|
|
|
|
|

|
Phantom Breaker:
The phantom always goes a set distance no matter the charge and it's also capable of breaking a fresh shield when fully charged (5%,6.5%,11.5%,12.5%,20%). This is a great spacing option for Zelda since it always goes the max distance and offers a large amount of shield pressure. This is easily one of her best customs. Only kills at very high percents (150+)
Tradeoffs:
Phantom Breaker always travels the max distance regardless of charge level. You lose your close range phantom attacks in exchange for medium ranged attacks that inflict a high amount of shield damage. Phantom Breaker offers the quickest mid range attacks since it always goes the set distance. A fully charged Phantom Breaker will break a fresh shield if it is held to block both slashes by the phantom.
|
Spacing:
Phantom Breaker offers the most range overall since it travels a set distance regardless of charge. This custom gives you a large amount of pressure since you can't simply shield the attack and you can't spot dodge it at full charge either since it is a two fold attack. This custom is your best option if you want to keep your distance in a match up when you are doing something like stock tanking. |
|
You use it better:
Nayru's Love/Nayru's Rejection (1/2) | Din's Blaze (3) | Farore's Wind/Farore's Squall (1/2) | Phantom Slash (1)
Format: Doubles
A set for doubles aimed to support a Villager partner. This set uses the phantom's blind spot in front of Zelda to your advantage by shooting it from directly behind your partner to pocket. Nayru's is a matter of preference. Nayru's Rejection allows you to potentially turn around opponents to hit each other while still being able to reflect Villager's tree for them to pocket, while Nayru's Love offers a more offensive based reflector. With Farore's Squall you can push your Villager teammate into opponents while they release a phantom/tree for surprise KOs. Farore's Wind is also a good choice in this set since you can keep your distance and stock tank then warp in for kills when needed.
|
Pros:
+ You gain a lot of support potential with Farore's Squall. + Farore's Squall can negate attacks by pushing them away before it connects. This unique property can also gimp some recoveries. + Phantom Slash and Trees can kill extremely early. + Din's Blaze allows you to set traps on the stage. This can buy time to get a tree ready or supply pressure for your partner when they are going in to kill with a tree/phantom. + Phantom Slash's blind spot allows you to shoot it from behind your partner to cover the team during the pocket setup. |
Cons:
- You lose a lot of kill potential if you use Farore's Squall. - Farore's Squall has a slower start up. - Din's Blaze can be difficult to use effectively with 4 players on the stage. - Nayru's Rejection is slower and deals less damage. |
Nayru's Rejection:
This move acts similar to the default Nayru's Love except the outer diamonds are replaced with a gust of wind that has a spin effect similar to Mario's cape. Hits 3 times for 7% total (1%,1%,5%). Anyone hit by this move will be flipped into the other direction. This can be useful offstage to cause people to recover in the wrong direction. Nayru's Rejection reflects projectiles at 1.2x the power and speed while granting a short duration of intangibility. Like Nayru's Love, Love Jumping is still possible with this custom equipped.
Tradeoffs:
Nayru's Rejection is very similar to Nayru's Love overall. This move is slightly slower with decreased range and deals less damage, but the outer diamonds are replaced with a cape effect that turns opponents in the opposite direction. The knock back from Nayru's Love is also replaced with a weak push effect. The main use I could see for this custom is flipping opponents around in doubles while they are using super armored moves to hit their partners. Other than that, Nayru's Love offers a lot more than Nayru's Rejection overall.
|
Choices:
Nayru's Love and Nayru's Rejection are very similar for the most part. The main difference is their frame data and damage. Nayru's Love is a more offensive based reflector with quicker frame data and more damage, while Nayru's Rejection is a defensive based reflector with slower frame data and less damage. I personally prefer Nayru's Love since it's better overall. One advantage of Nayru's Rejection is the ability to block approaches and combo it into grabs. |
|
Din's Blaze:
A slower and more powerful version of the default that gives you a large influence in directional control, but it has a delayed explosion. Deals 16.5% damage on sweet spots and 9% on sour spots. Din's Blaze is great for setting traps when the opponent is high in the air to force air dodges or offstage to punish recoveries. Din's Blaze deals more damage the longer it travels and has a sweet spot that can kill. This version of Din's can be very tricky to use and it's probably the most fun out of her customs to play around with.
Tradeoffs:
Din's Blaze is the hardest version of Din's Fire to use. The delayed explosion means it is even harder to sweet spot than the default and requires a lot of predicting/reads to use properly. However, the delay and increased control of Din's Blaze is what makes it a great move. The tradeoff for this move is it's the slowest version of Din's Fire and the hardest version to use effectively, but it has devastating power and total control of the movement.
|
Edge Guarding:
Din's Blaze excels at edge guarding! You can set a trap anywhere offstage to catch players trying to get back to the ledge. The lingering effect on this move allows it to supply constant pressure while you get into position to punish an air dodge with a Dair spike if needed. Din's Blaze basically allows you to control the opponents recovery. |
